Why do we need to expose our localhost to the Internet?
If you are a web developer, or developing any backend applications, then at some point, you might have needed to share a public url for your service which is running locally on your machine. You can access those services on your local network by using the IP address of your machine, but people outside your network, and on the Internet could not access your service, since most ISPs block incoming requests, and you will need to get a static IP address, simply put, it is not simple to expose your localhost like that.
Using Tunnels
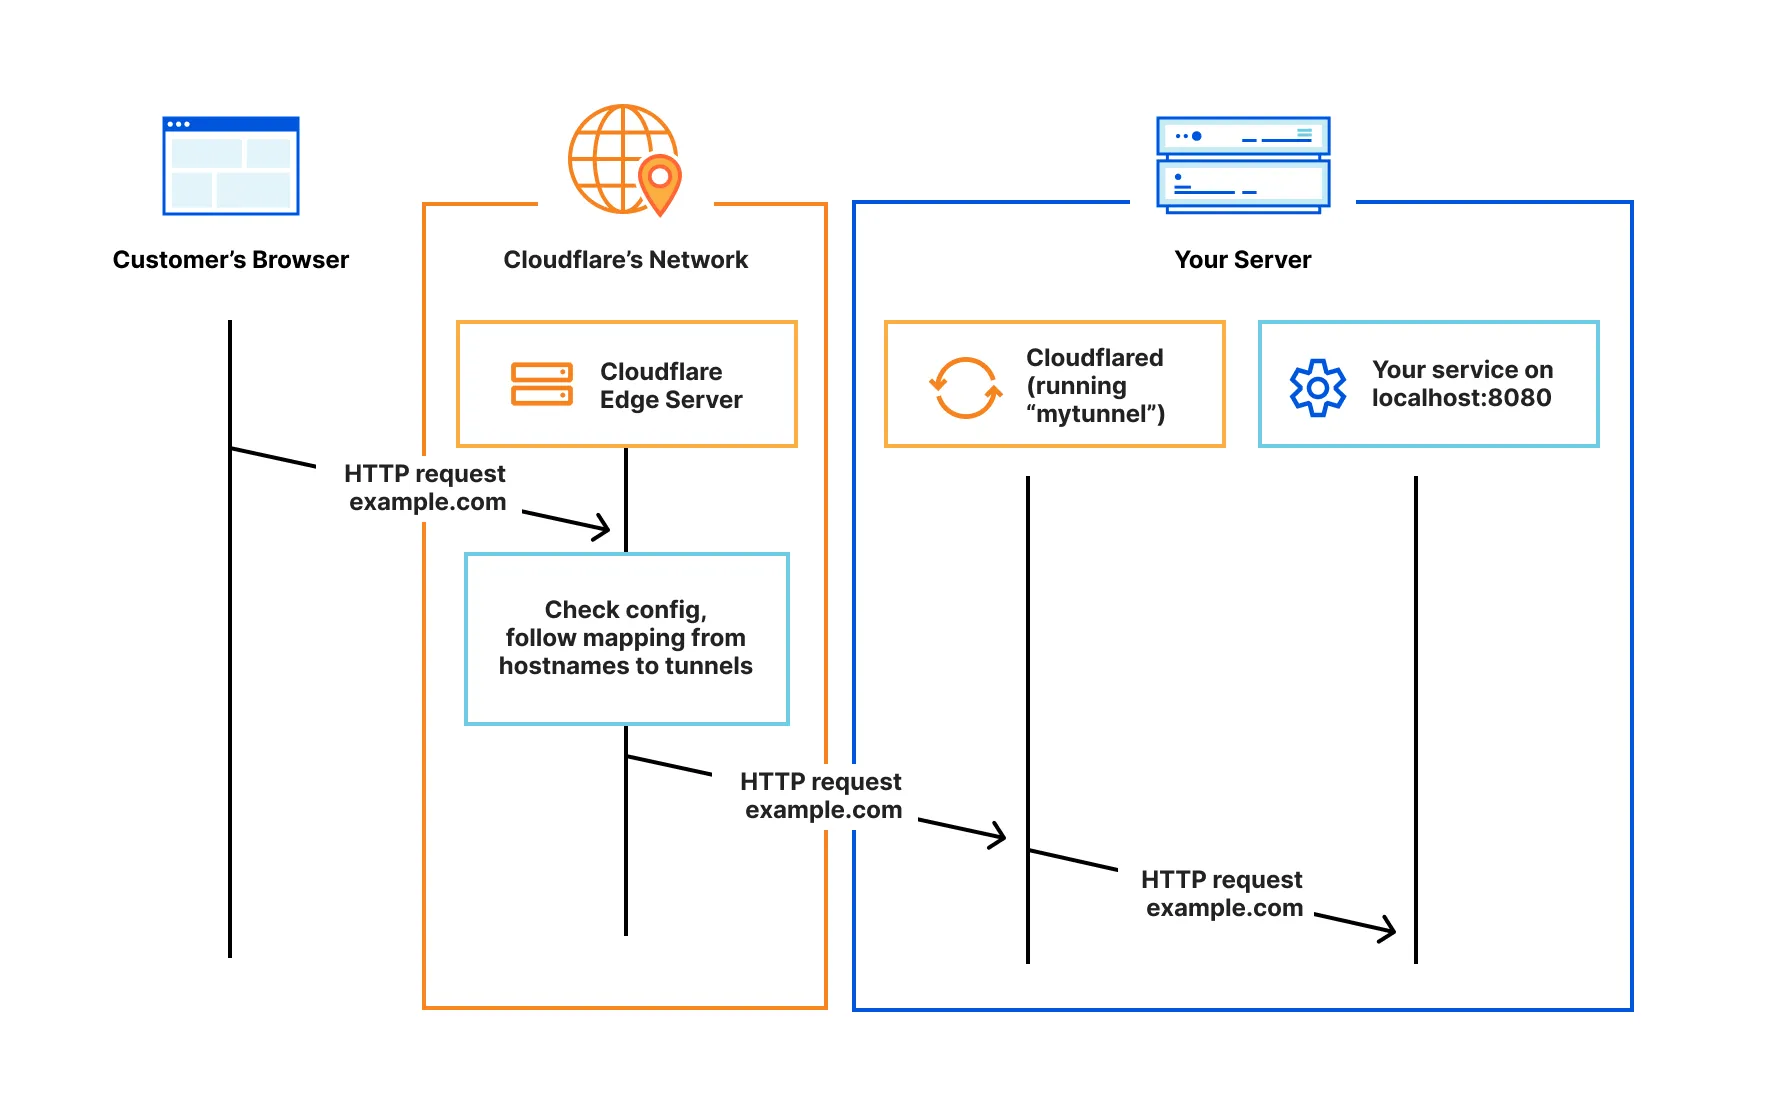
This is where tunneling services like Cloudflare Tunnels and ngrok comes into play. Using tunnels, you don't need to worry about all the stuff we mentioned earlier, they work differently. You install a service which is continously running on your machine in the background, and when you create a tunnel, your visitor will get a URL which hits cloudflare's servers, which contact the service running on your machine, and serves the users.
How to use Cloudflare Tunnels?
Now that we have a basic overview of how tunnels work, we can move on to the next step, which is installing cloudflared and running a tunnel on your device.
This tutorial assumes that you use Cloudflare as a DNS provider for your hostname, as we will be creating urls using a domain which you have registered, and is managing through Cloudflare DNS.
First step is to download and install cloudflared which is the service which runs indefinitely in the background on your machine.
There are specific binaries available for Windows, MacOS, and Linux, you can check out https://developers.cloudflare.com/cloudflare-one/connections/connect-networks/downloads/ for the latest download urls. To install the daemon on windows, open a terminal window, and run the winget command like this:
winget install --id Cloudflare.cloudflaredThis will install the daemon. After you install the daemon, using the left sidebar menu, navigate to Zero Trust and setup a free team.
Inside the zero trust dashboard, navigate to Networks > Tunnels
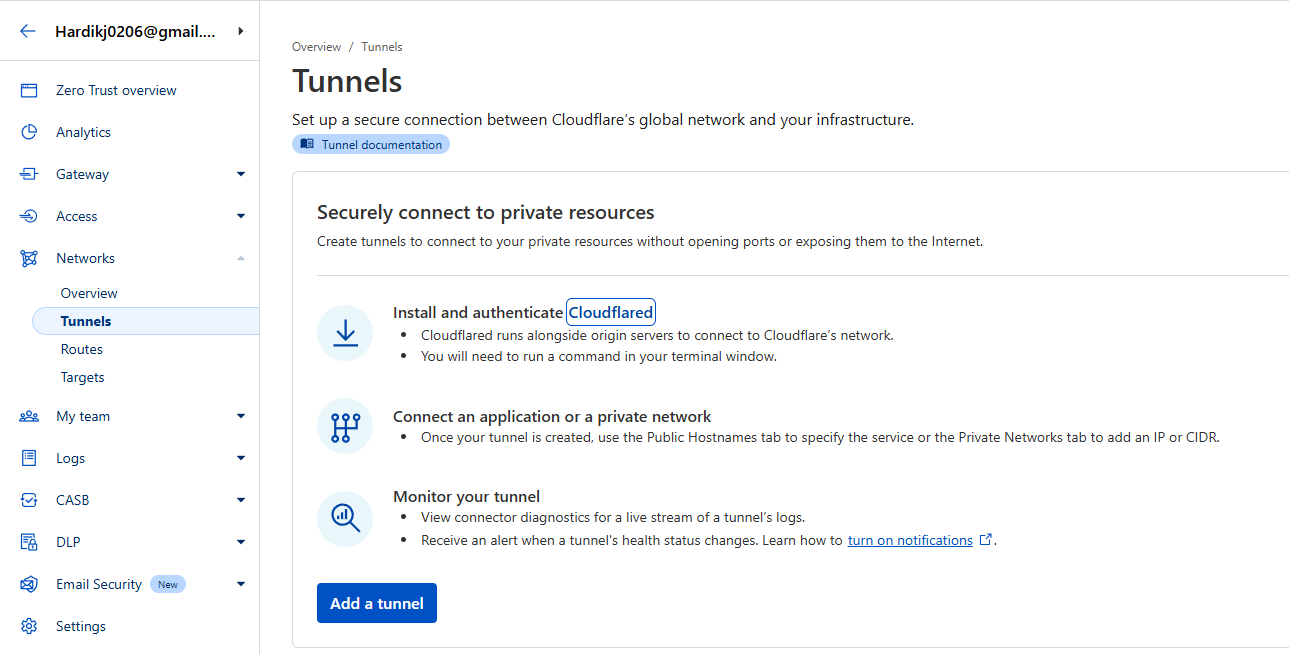
Click on add a tunnel, select cloudflared for the tunnel type. Next you will need to give your tunnel a name, give it any name.
Now you will get a command to execute, to connect your tunnel to the service running on your machine.
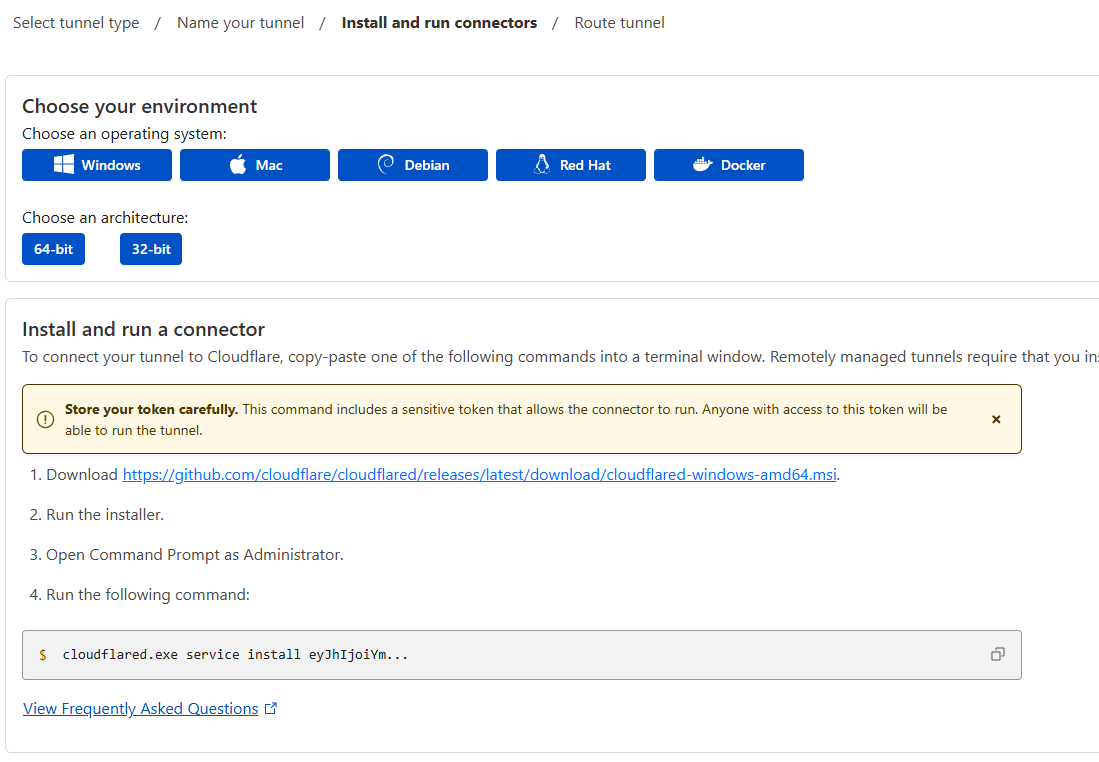
Copy the command, paste it in the terminal. (If you are on windows, you will need to run command prompt / powershell as administrator)
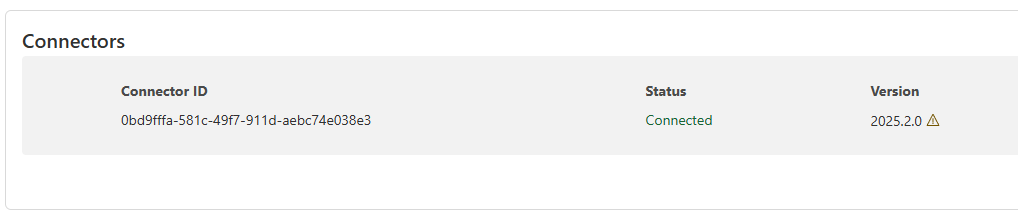
Now your cloudflare tunnel is connected. Once you are connected, you will see a connector id on the same page